Drop in Widget
Add the widget library
Installing the Sportstalk widget requires only 3 steps:
STEP 1: Install the javascript code in the HEAD of your website.
<head>
    <script defer="defer" src="https://sportstalk-widgets.s3.eu-west-2.amazonaws.com/chat-widget/static/js/chat-widget.js">
</head>
STEP 2: Add a div tag to your page with the “chat-widget” ID.
Note: It’s not necessary to use “chat-widget” as the ID, You can choose a different element ID if you want, see initialize() API method.
<div id="chat-widget"></div>
NOTE: It’s best to specify the dimensions of the chat-widget using CSS. The widget will try to occupy the maximum space available. Usually this works perfectly but in some layouts it’s important to specify the exact height/width of the widget <div>.
STEP 3: Launch widget
Anywhere after your ID is set, or after the page is fully rendered, you can call the initialize() method on the chat object, followed by setting a user and joining a room:
window.ChatWidget.initialize('chat-widget', {
       appId:'{found-appid-in-your-dashboard},
       apiToken: '{found-in-dashboard-with-appid}',
       endpoint: 'https://api.sportstalk247.com/api/v3/'  // Replace this with your proxy if one is in use.
     });
window.ChatWidget.setUser({
       userid: '{logged-in-user-id}' || '',
       pictureurl: '{http://some-url-to-user-image}',
       handle: '{user-handle-if-there-is-one}'
       displayname: '{user-display-name}'
     });
window.ChatWidget.joinRoom("{Get room ID from Dashboard or using API}").then((ans)=> {
       console.log("Joined");
     });
NOTE: You need to get an appId and apiToken from the Sportstalk dashboard
If the user or userid doesn’t exist, it will automatically be created in your Sportstalk Dashboard.
Read more about the SDK we are using here: https://sportstalk-sdk-javascript.readthedocs.io/en/latest/
To know how to use Supported methods, please read 1. Methods
To know how to customize styles via CSS classes, please read 2. Styling Customization
Widget API
1. Methods
initialize()setUser()joinRoom()sendAnnouncement()sendAdvertisement()
1.1. initialize()
window.ChatWidget.initialize(elementId, {appId, apiToken, endpoint});
Sets configuration to initialize the widget
Parameters:
Name |
Type |
Required |
Description |
|---|---|---|---|
elementId |
string |
Yes |
Html element ID |
appId |
string |
Yes |
Sportstalk chat app ID |
apiToken |
string |
Yes |
Your Chat app token |
endpoint |
string |
No |
Custom sportstalk chat endpoint |
Note: you should use a proxy to hide your token and restrict behavior to specific domains on the web, or use our new token permissions and allowed domains features (coming soon) to enforce security.
1.2. setUser()
window.ChatWidget.setUser({ userid: this.value });
Sets current user by ID. The userID is decided by your application, to match your user database. This allows seamless connection of your existing user IDs and sportstalk.
Parameters:
Name |
Type |
Required |
Description |
|---|---|---|---|
userid |
string |
Yes |
Sportstalk user ID |
1.3. joinRoom()
window.ChatWidget.joinRoom(roomID);
Join a chat room. You can find the room ID in the sportstalk dashboard
Parameters:
Name |
Type |
Required |
Description |
|---|---|---|---|
roomID |
string |
Yes |
Sportstalk room ID |
1.4. sendAnnouncement()
window.ChatWidget.sendAnnouncement(text);
Send an annnoucemnt, latest annnoucemnt will be pinned on top by default.
Parameters:
Name |
Type |
Required |
Description |
|---|---|---|---|
text |
string |
Yes |
Annnoucemnt body |
1.5. sendAdvertisement()
window.ChatWidget.sendAdvertisement({imageUrl, link});
Sends an advertisement.
Parameters:
Name |
Type |
Required |
Description |
|---|---|---|---|
imageUrl |
string |
Yes |
Url to advertisment banner imageUrl |
link |
string |
Yes |
Url will be opened when click on banner |
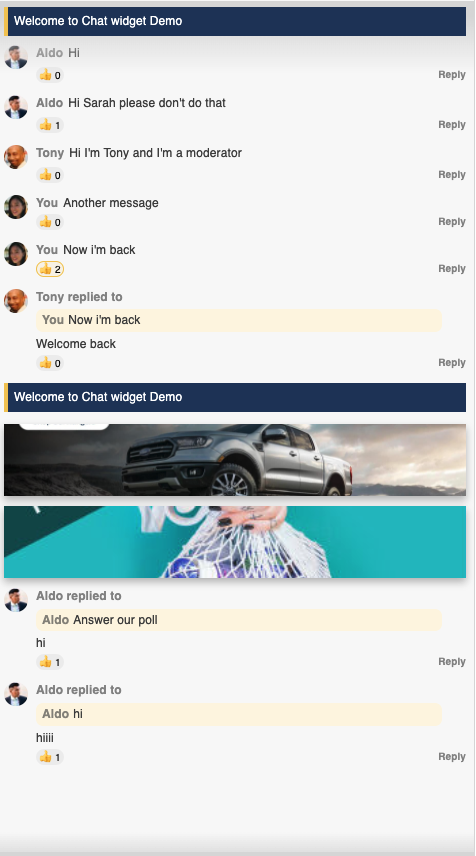
Note: the dimensions should be about 5:1 of width:height, e.g. 400x72px. The advertisement will show as a slim strip. When the user clicks on the strip, they will be navigate to the Link.
1. Styling Customization
2.1. Global
Using defined Chat Widget’s Element ID is highly recommended.
Note: Chat widget uses MUI’s Components, so all the instructions for styling MUI components apply to the Sportstalk chat widget.
Example:
Chat Widget’s Element ID:
chat-widgetCSS to override can be
<style>
  #chat-widget * {
    font-family: 'Helvetica';
  }
</style>
2.2. Chat box
2.2.1. .CW-ChatBox__container
Container of Header, Messages Container and Message Box (input).
Potential customization: Background color.
2.2.2. .CW-ChatBox-Messages__container
Container wraps scrollable list of Messages.
Potential customization: Background color.
2.3. Chat box’s Header
Default Height:
38px
2.3.1. .CW-Header__container

Potential customization: Background color.
2.3.2. .CW-Header-Title
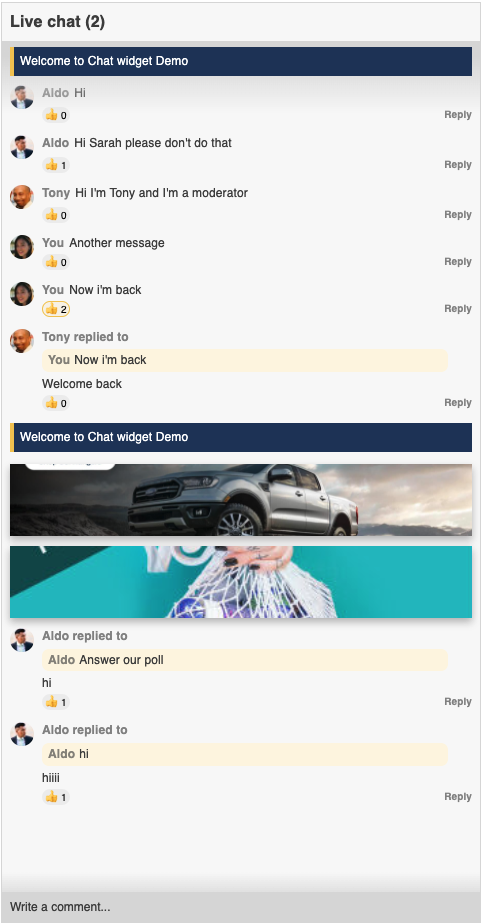
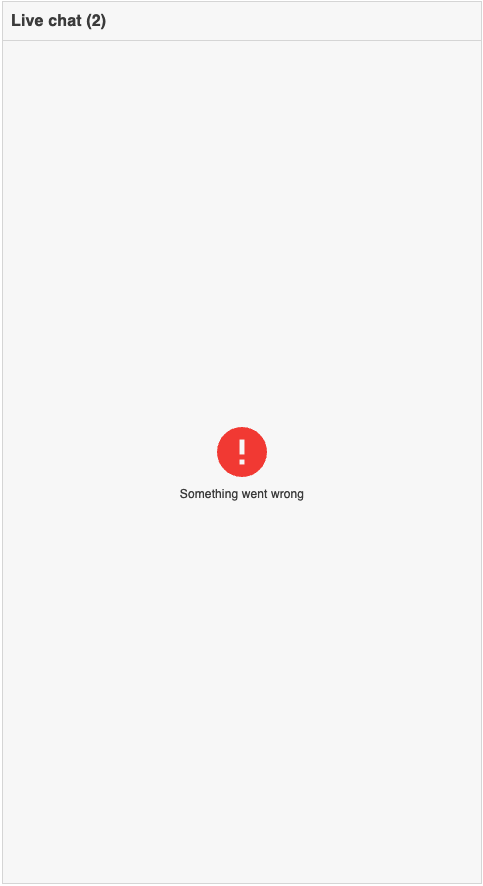
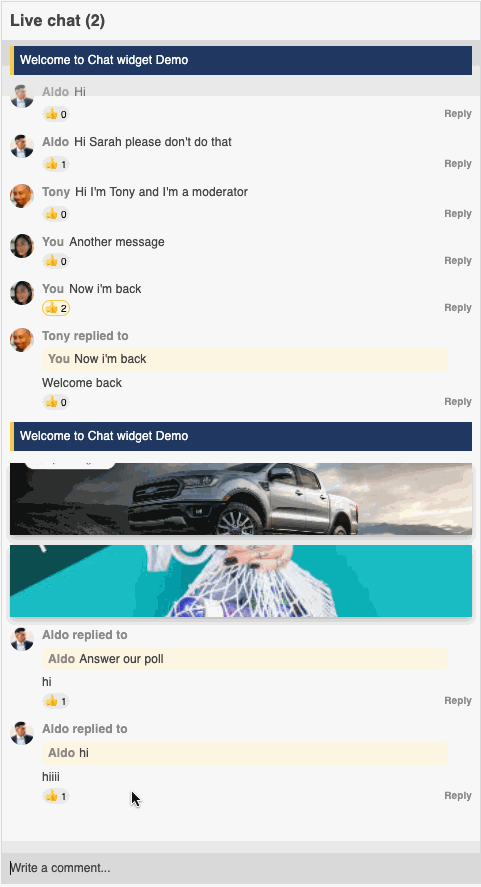
It’s the text “Live chat (2)” in above photo.
Potential customization
Font size
Text color
2.4. Chat box’s Alternate
2.4.1. .CW-ChatBox-Alternate__container
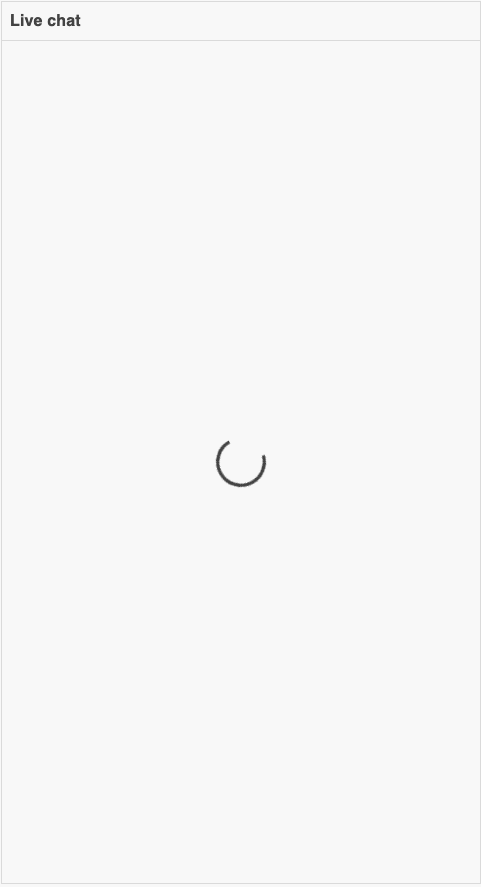
Container of Loading state & Error states.
Potential customization: Background color.
2.4.2. .CW-ChatBox-Alternate-ErrorBounce__container
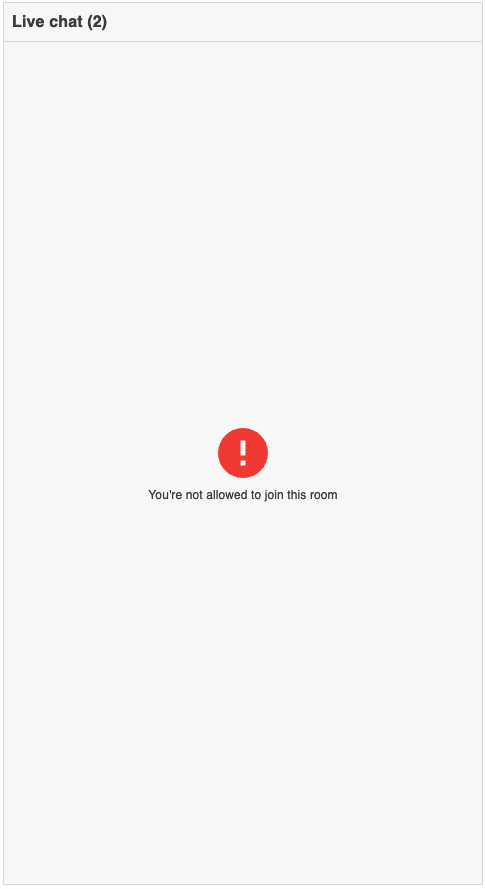
Container of Bounced error
Potential customization
Background color
Error icon’s color
2.4.3. .CW-ChatBox-Alternate-ErrorUnknown__container
Container of Unknown error
Potential customization
Background color
Error icon’s color
2.5. Message item
2.5.1. Latest Announcement

2.5.1.1. .CW-LatestAnnouncement__container
Container of Latest Announcement
Potential customization: Margin
2.5.1.2. .CW-LatestAnnouncementText__container
Container of Latest Announcement’s text
Potential customization
Background color
Left’s yellow highlight using
&:before
2.5.1.3. .CW-LatestAnnouncement-Text
Potential customization
Font size
Text color
2.5.2. Announcement

2.5.2.1. .CW-MessageItem-Announcement__container
Container of Announcement
Potential customization: Margin
2.5.2.2. .CW-MessageItem-AnnouncementText__container
Container of Announcement’s text
Potential customization
Background color
Left’s yellow highlight using
&:before
2.5.2.3. .CW-MessageItem-Announcement-Text
Potential customization
Font size
Text color
2.5.3. Advertisement

2.5.3.1. .CW-MessageItem-Advertisement__container
Container of Advertisement
Potential customization
Margin
Drop shadow
2.5.3.2. .CW-MessageItem-Advertisement-Image
Default height:
72pxPotential customization
Height
Background (Image URL, Position, Size, …)
2.5.4. Speech

2.5.4.1. .CW-MessageItem-Speech__container
Container of Speech
Potential customization: Margin
Placeholder:
.CW-MessageItem-Speech-AuthorImage__placeholderPotential customization: Size
Potential customization
Font size
Text color
Container of Replied message in current Message
Potential customization
Margin
Background color
2.5.4.5. .CW-MessageItem-Speech-Reaction__container
Container of Message’s Reactions
Potential customization
Font size
Text color
Hover state
Potential customization
Font size
Text color
Hover state
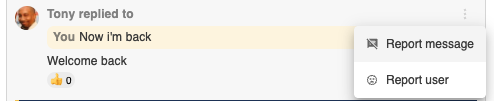
2.5.4.7. .CW-MessageItem-Speech-Actions__container
Table of Actions can be done for each Message.
The Action table is displayed when clicking on 3 dots icon.
3 dots icon is displayed when hovering over the Message, which is handled by
.CW-MessageItem-Message-Content__container:hover
2.5.5. Local
This is a local message show to current user only
Potential customization
Font size
Text color
2.6. Message Box (textarea)

Min height:
26px.
2.6.1. .CW-MessageBox__container
Potential customization Margin
2.6.2. .CW-MessageBox-Textarea
Potential customization
Padding
Background color
Font size
Text color
2.6.3. .CW-MessageBox-Gradient
Potential customization: Background’s gradient
Container of Replying message, appears above Message Box when clicking on button
Replyof a message.Potential customization
Padding
Background’s gradient
Border
2.6.4.1. .CW-MessageBox-ReplyingMessage-Text
Potential customization
Font size
Text color
Potential customization
Padding
Background color
Font size
Text color